To Everna and Beyond!
The official blog and novelblog for Evernade Saga and FireHeart Saga by Andry Chang
"Come forth, Paladins! Fulfill your destiny!"
Explore Worlds in Clicks
Thursday, October 28, 2010
Trailer Doppelgänger RPG Maker 2000
http://www.youtube.com/watch?v=RiIcfrFP2Kg
RPG Maker 2000
Doppelganger
FireHeart Paladins Walkthrough - Chapter Seven Part 3 (Final)

Stage V: Pyro’s Pyres
The plot thickens as more heroes come rushing in. In the rune room (C3) for instance, just touch the epitaph and the story moves on.
At the end of the cutscene, a hero named Alexis Deveraux, Crown Prince of Arcadia joins your party (it’s in version 5 and up. In previous versions, you can add him using the Party Log Book after Sheena’s event in (B3) Note that in version 1-3, Dar’gum, Sheena and Alexis are selectable only by passing that event B3).
The party setup is: Alexis, Hernan, Vera and a healer, either Iris, Chris or Paolo.
To pass this stage, your job is to open the four gates in (D3) by operating four switches A-B-C-D. Refer to the cluster map for location of switches.
The map itself is as follows: (16 cells, text mode)
A1 – A2 – A3 – A4
B1 – B2 – B3 – B4
C1 – C2 – C3 – C4
D1 – D2 – D3 – D4
Switches are in:
SWITCH A: D1 (enter from D2)
SWITCH B: A3 (enter from A2)
SWITCH C: B4 (enter from A4)
SWITCH D: C1 (enter from A1 – B1)
The Complete Route:
Switch A:
C3 – C2 – B2 – C2 – C1 – D1 – D2 – D1 – Turn Switch A off.
Switch B:
D1 – D2 – D1 – C1 – B1 – A1 – A2 – Top right to A3 – Turn Switch B off.
Switch C:
A3 – A2 – A3 – A4 – B4 – Turn Switch C off.
Switch D:
B4 detour – A4 – A3 – (B3 going to B4 to get Sheena – A3) – A2 – A1
B1 – Down left to C1 – Turn Switch D off.
So, just follow the route and turn off the switches in the A-B-C-D order. Remember, get the sequence wrong and you’ll have to do it from the start again.
Along the way, in cell (B3) you’ll get a mandatory cutscene (just approach the girl merchants to trigger it) involving Sheena, Baxter, Ellephar, the girl scouts and a battle with dark elves and orcs.
At the end of which, Sheena Mekh’ta the Corsair will join your party (or selectable from the Party Log Book).
Move on all the way through (C5), (D5), (D4) and finally (D3).
If you haven’t opened the four gates, you can detour through (C3) or (D4) and go all the way to the switch in question.
If you have opened them all, just exit downwards to...

Lava Cave
This is the area where the Sanctum and the Sanctum Guardians get their energy from. In this BOSS area of Pyro’s Pyres you just need to go down and center by defeating the Fire Elementals blocking your way.
At the center of this area, make sure you have your party all-prepared, restored and Herman and Vera are in your main party. And on to a surprise attack by:
BOSS: Fire Wyrm (Battle 2x @ HP:9000)
Just like in the story, there are two of them. Up to Version 5, the battle is of two consecutive rounds, In each you’ll battle the wyrms one at a time. The wyrms are too tough if you fight 2 of them at once, but hey, we can fix that on popular demand in maybe version six or so.
Basically, the fire wyrms use powerful fire-breathing attacks and quite vulnerable to ice and water, so with an average level of 23+ or so, they won’t be too tough customers.
With the fire wyrms out of the picture, you are free to go. REMEMBER to move up and go to the bottom corner left and right to open two treasure chests with powerful items inside.
Finish what you need to do or left behind – including recruiting Sheena.
Take out all your money from the bank if you haven’t do so already.
Make sure you’re all ready because there will be NO TURNING BACK after this.
When you do, just walk downwards from the center area where you fought the BOSS and a hidden switch on the floor will trigger a long story-related cutscene that will eventually transport you to the next stage.

Stage VI: Saturn’s Space
Whew, that sacrificial pit just now is just a magical illusion and you land on the upper right corner of this one-map stage.
Here, Father Bernides the morbit (were-rabbit) will heal your entire party for free, and Akh’mal the minotaur shaman will sell you godly, hyper-expensive weapons not released yet in the original story. If you have enough money, just buy one or two because you can still take on the FINAL BOSS without them – only if you want to find out how powerful the actual godly weapons actually are...
Like in the story, there are five bosses in this stage and it’s better if you fight them in this order: Eshmyr, Jokl, Borg, Vyr and Voltar.
To take on the first BOSS – Eshmyr the Wind, set your main party to Dar’gum, Adler, Desmond and Iris as support (suggested formation). Walk counter-clockwise along this labyrinth-like map, and move to the center of the map from the north. “Touch” the wind-icon roadblock there to engage the first of five:
MINI-BOSS: Eshmyr the Wind (HP: 10000)
Also known as Windmare, it’s very agile, so the suggested formation party will be your best bet to defeat it quicky. Beware its [Tornado], [Typhoon] and [Slow Move] skills.
Finished with it, and on to the next MINI-BOSS. Continue counter-clockwise and enter the center platform from the west. Set your main party to: Robert, Carolyn, Paolo and Sheena, restore fully all party, touch the “water” west icon to battle with:

MINI-BOSS: Jokl the Water (HP:10000, ATT:145, DEF:112)
This water elemental alligator monster can overwhelm any foe with the most powerful water attacks. With Rob and Carol in the party bombarding Fire Slashes, Fireblasts and Fireballs, the battle can somewhat become easier.
Repeat the process after taking care of Jokl – go left, follow the road counter-clockwise to the south part. Don’t forget to explore all corners of this map and open all treasure chests to get the best weapons and armor in the game and the most powerful item: [Divine Retribution].
About [Divine Retribution] item:
If you give alms to the church or the poor, let’s say 5000 geines at most, this item will give you much leverage when battling the last BOSS, because the randomized 3500-5000 damage it can cause to enemy consumes an amount of [Vadis’ Blessings] meter gained from the alms. It’s a consumable one-use item, so spend it wisely.
Back to the track, go from the southern part of the map to the center. Set your party to: Alexis, Cristophe, Kyflynn and Iris and touch the south “earth” icon and engage:

MINI-BOSS: Borg the Earth (HP: 10000, ATT: 150, DEF: 138)
With its big HP and physical attack and defense, Alexis and Chris will be the best bet to endure this fight.
Done with “earth”, next is “fire” from the mid-east. Set your party to optimum with Hernan, Vera, Erydos and Paolo.
EXTRA: See the blinking star just northeast from the center of the map just when you come near the fire icon? Just walk up to it and press ACTION button, and you’ll get the ULTRA SECRET BONUS – as thanks for reading this walkthrough.

MINI-BOSS: Vyr the Fire (HP: 10000)
With Attack 155 and Defense 96, Vyr has the strongest attack power of the five with skills of: Dragonbreath, Flame and Spirit Oblivion.
Just as other BOSSes, just make use of element affinity to gain advantage.
After taking care of the large lizzy, restore all your party’s HP and MP and select your best or favourite members for the starting grid. Save your game, move to the void in the center of the map to trigger a battle with:

BOSS: Voltar the Lightning (HP: 10000)
ATT: 150 / DEF: 114 / SPI: 140 / AGI: 123
This lightning phoenix might not be the toughest of the lot, but its “flying” attribute makes it hard to hit, earning it the last BOSS place of the five.
We suggested you to select your best, strongest members of your party because after this comes the non-stop FINAL BOSS battle, so rather make sure your best four finish Voltar so you won’t have to waste a turn changing party members in battle. Again, anyone is okay. Level 25+ is preferable.
After battle you’ll be instantly transported to to:

Core of the Universe

Aegis the Thunder Bird - Carolyn's Guardian Spirit is here.
A long, story cutscene starts automatically, thus plunges your party into a series of battles with:
FINAL BOSS: Chimera and Paliades

Chimera: HP: 16300, ATT:160, DEF: 130, SPI: 140, AGI: 100

Paliades: HP: 7000, ATT: 150, DEF: 120, SPI: 130, AGI: 100
Wielding the Deathblade Kraal’shazar, Paliades’ attacks are of dark powers, inherited from Vordac the Dark OverLord. So, naturally, Cristophe is the best to deal with him.
As for Chimera, just make sure that your HP is high and somebody is reserved to heal your entire party every 2 turns or so. That monster is actually a merging between Borg, Voltar, Jokl, Vyr and Eshmyr, so it uses all the most powerful attacks of any element that can deal around 1000 damage each, affecting the entire party.
Just work on the weaker Paliades first with Cristophe as anchor. With Paliades out of the picture, you can concentrate on Chimera. Again, the skill [Sandstorm Skirmish] can be of tactical advantage.
During beta-tests, we worked very hard to adjust the toughness of this monster, and if this setting is not “killing” enough, please let us know.
Eventually, if you ever beat this BOSS, congratulations – but it’s not over yet. Paliades still has the last ace in his sleeve and uses it by merging his body into Chimera, forming into one ultimate monster:

FINAL BOSS: Chimera Paliades
HP: 25000, ATT: 180, DEF: 130, SPI: 150, AGI: 100
We’re talking EXTREME here. Up to Full Version 5, you’re given a chance to restore your party’s HP and MP first before engaging Chimera-Paliades. Again, choose the best among your party members, save your game and you’ll automatically engage him.
Chimera-Paliades has two new ultimate attacks: [Cataclysm] and [Apocalypse], the non-elemental super-explosions. [Apocalypse] in particular can cause critical damage to party members until they’re low on HP.
So, this is a good time to use the ultimate magic item: [Divine Retribution]. The rest depends on your strategy, timing and a bit of luck.
A long cutscene that involves clicking SPACEBAR every now and then ensues, after which you only need to walk down to the portal down the screen that teleports your avatar to the final area.
Enia’s Sanctum – Temple Entrance
You get no enemy encounter here, but if you should want to wander around again through Gorgon’s Groves, beating monsters and such with your ultimate skills, just go ahead. Just consider the story is already finished.
If you don’t or you’ve had enough wandering around, all you have to do is walk under the blimp (a.k.a. Airship Aurora) and press ACTION button to “ride” in it. The ending scene ensues, and as we say in the “Credits” section, congratulations for finishing the game and thank you for playing the game and reading the walkthrough.
A little note, if we ever going to make the sequel of this game: FireHeart – Masks of the Soul, we won’t use any of the saved game from “The Bounty Hunters”. There might be undiscovered bugs or a feel of imbalance in this game, so we welcome feedbacks in www.fireheart.tk or any of our threads in RPG Maker forums, and we’ll work on the improvements right away.
Again, we thank you for downloading and playing this game.
Come forth Paladins, fulfill your destiny!
Andry Chang for Vadis Productions
October 28, 2010
FireHeart Paladins Walkthrough - Chapter Seven Part 2

Stage III: Gaea’s Grounds
At the start of this “earth” area in Enia’s Sanctum, again you find an epitaph in the center of the first room. And again, just touch that epitaph to get the story going and the roadblocks vanishing.
A new hero joins your ranks: Adler von Bachmann. He joins your party straightaway in Version 5 and up, otherwise you may choose not to add him now because he will stay in the active party and cannot be removed until the next stage.
The challenge is somewhat simpler than in previous 2 stages. You just have to follow the road, unlock the switches and beat all the rock golems “blocking” the road.
However, spike traps are going up and down everywhere, just proceed carefully and study the trap timing so your party won’t lose HP needlessly.
(Text Version) Room Layout
--------------- (BOSS) ----------------
(8) Switch B – (9)up to BOSS – (10) Switch C
- (7) is cancelled, goto straight to 9 -
(6) Switch A – (5) intersection – (4) left
(1) Rune Room – (2) right – (3) up
Route Overview:
R1 – R2 – R3 – R4 – R5 – R2 – R5 – R6 (Switch A) – R5 – R9 – R8 (Switch B) – R10 (Switch C) – R9 – BOSS
Also, there is a roadblock in room 5 and two in room 9 which must be unlocked by pulling levers (switches). Switch (A) in room 5 is unlocked by pulling lever (A) in room 6 (after a cutscene with Sheena, Baxter & Ellephar).
Switch (B) and (C) are in room 9. To unlock switch (B) move the lever on the center of the map in the middle of a pool of “tricky” spike traps.
To unlock switch (C), go to room 10. There, you must do a “Mole Stomp” mini-game. Just go around the “sandy area” within the fence and press ACTION button randomly to stomp the mole out of the sand. Stomp three moles (out of 4 in the area) and the switch will be unlocked.
In the BOSS room, just walk up to face the guardians of Gaea’s Grounds:

BOSS: Giant Stone Gargoyles x2 (HP: 5000 x 2)
If one is not challenging enough, we give you two! Yes, people! These winged stone dragons action-packed with fire and earth-based attacks and thick stone skin for ultra-defense are very tough indeed! Beware of their Paralysis Breath skill, it’s as lethal as any Basilisk would have!
Other skills: Slow move, Dragonbreath & Earthquake.
After beating the BOSS, however, comes another trouble. The nine tiles at the center of the room are actually switches which must be pressed by pressing ACTION button on top of each to unlock the combination key on the elevator gate.
The tile sequence is:
(1) – (2) – (3)
(4) – (5) – (6)
(7) – (8) – (9)
Normally, without this walkthrough you just need to guess the right combination and ask the four NPCs around the area for clues.
Up to Full Version 5, the only right sequence is: 6-3-1-8 (which Father Paolo gives).
The lift gate opens automatically, but this sequence also triggers another roadblock: the orcs.
Prepare your party first with full HP and MP with Kyflynn and Iris in the main party, walk up and “talk” to the orc to trigger a battle with...

HIDDEN BOSS: Behemoth (HP: 8800)
The Ancient Earth Dragon, Behemoth Barudan actually supports the Gremion Orcs and the Dark Side. As his enormous size can tell, he got plenty of HP, defense (115) and attack (131) power. Spirit (113) is also great, and its only drawback is Agility (63).
A 4-member party with average levels of 22 and up won’t get too much trouble subduing this HIDDEN BOSS.
After all is done here, just walk into the crystal-powered elevator and descend to the next area.

Stage IV: Scylla’s Chills
This “Chill Zone” is actually a 17-room ice cave forming a single snowflake (see the diagram map).
As you exit the elevator, just go right up and talk to the long-haired man on the upper left: Don Hernan y Parvaez. You can skip talking to him if you want and go farther to the top exit of the map.
A man with white mustache stands on the exit. Just press ACTION button and talk to him, and you’re now acquainted with Erydos Crydias (“Eidos” in version 1-4) from Parthenia. Thus, he and Hernan join your party in standby mode.
Naturally, Robert and Carolyn’s fire skills are of great advantage in this stage.
Area 2, the top room is the rune room. So, as usual, just press ACTION button at the epitaph to get the story going and the roadblocks vanishing.
Beware: There are hidden traps that can confuse Robert, Chris, Adler or the entire party (random effect). So just be prepared with lots of items such as Mandrake Roots or Mandrake Extract, or party member with [Cure] skill.
As you might’ve observed, the elevator down to the next stage is locked shut, and you must unlock it by “touching” the locking crystals in sequence, that is A-B-C-D. Get the wrong order, and you’ll need to do it from the start again (just like in Yggdrasil Forest).
To make things short, just see the diagram and go to the crystals straightaway.
Note: Room 13 is a blocked way. Just avoid entering this path unless you want to get the treasure chest by entering from the left.

SPOILER: The complete route is: (text version)
Crystal A:
(1) up – (2) rune room – left to (11) – down to (6) – unlock Crystal (A) – left (10) – down to (3) – right to (1). Check: Crystal A appears here.
Crystal B:
(1) up to (2) – right to (12) – down to (7) – unlock Crystal (B) – up to (12) (except if you want to check room (13) first) – left to (2) – down to (1) – check Crystal B.
Along the way, you need to exit to the bottom of the core area (1) to area (5). There, you see 3 orcs standing side-by-side. Just walk farther downwards to trigger a cutscene and a duel between Robert (alone) and:

MINI-BOSS: Bragl Dar’gum Stormbringer (HP: 5000)
Powerful that he might be with the earth moves which are originally his, Robert can defeat him at level 20 and up (see the movie footage in www.fireheart.tk).
TIP: Just always seek to stun / paralyze Dar’gum with items and his “rather unoriginal” skill, Sandstorm Skirmish.
After that fight comes a cutscene that results in Dar’gum joining your party.
Back to the “crystal-touching” rituals.
Crystal C:
From room (5) go left to (16) – up to (8) – unlock Crystal (C) – left to (17) – up to (3) – right to (1), check Crystal C is lit.
Crystal D:
(1) – right to (4) – down to (14) – left (9) – unlock Crystal (D) – right to (14) – up (4) – left (1) – check Crystal D is lit and restore full + save your game.
After you touch all 4 crystals, go back to Room 1. Refill your entire party’s HP & MP and touch the roadblock to the bottom elevator. Alas, it doesn’t open, instead it plunges you into battle with:

BOSS: Ice Elemental Generator (HP: 9500)
ATK: 140, DEF: 112, SPI: 128, AGI: 92
Skills: Water Cannon, Maelstrom
Vulnerable: Fire, Lightning
Immune: Water
Here, this diabolical machine is accompanied by four ice elementals. Up until Version 5, we don’t bother adding events to add a new ice elemental every say, 5 turns or so to accommodate the story, because it’ll make this BOSS too powerful than it actually is. Instead, it uses powerful WATER spells including Maelstrom to attack you (and never physical attacks).
Disable the machine, and you may pass this stage, descending with the elevator to the next stage: Pyro’s Pyres.
FireHeart Fan Sketches by DyingMano8
http://dyingmano8.deviantart.com/
FireHeart-1 by ~DyingMano8 on deviantART
Robert Chandler
FireHeart-2 by ~DyingMano8 on deviantART
Cristophe Deveraux
Wednesday, October 27, 2010
The Inheritance Almanac On-Sale Today and Enter a Super Fan Contest!
No images? Click HERE.
 |
| october 2010 | Check out horrifying Halloween titles, the Inheritance Almanac, and enter the Torment Halloween contest! |
| |
|
|
| Look for these other spine-chilling reads! | ||||
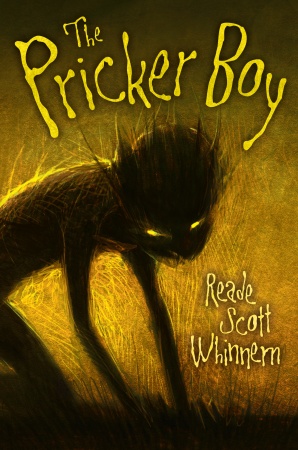 The Pricker Boy |  Banished | 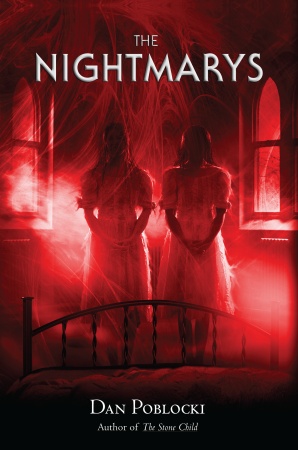 The Nightmarys | 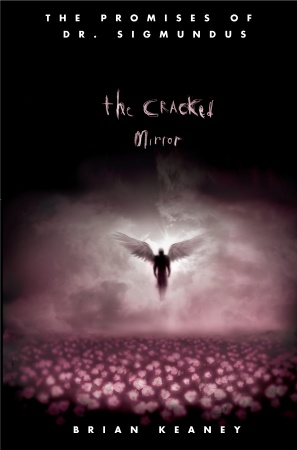 The Cracked Mirror | 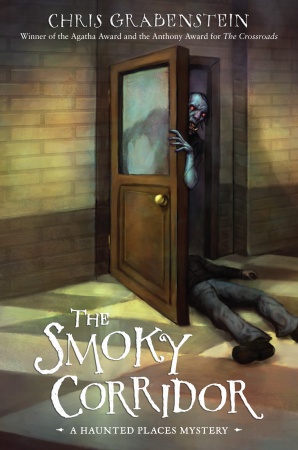 The Smoky Corridor |
| |
| | Copyright © 2010 Random House, Inc. All Rights Reserved. . |

The Inheritance Almanac On-Sale Today and Enter a Super Fan Contest!
Click here to see images.
| |
| |||||||
| |||||||
|

Monday, October 25, 2010
FireHeart Paladins Walkthrough - Chapter Seven Part 1

FIREHEART – Legend of the Paladins
Book One: The Bounty Hunters
GAME WALKTHROUGH – Part Three
CHAPTER SEVEN
INTO THE SUN
REMEMBER: Withdraw all your money from the bank in Medellar if you stored it. Better bear with the bandits some more (in case there are Melchior Bank agents in Gaea’s Grounds or Pyro’s Pyres). Make sure you get your “Vadis’ Blessings” meter to about 5000 or 10000 by giving alms to the poor / the church.
Enia’s Sanctum
From the world map, enter by stepping into the “tent” icon. As our heroes enter the vicinity of Enia’s Sanctuary, they are greeted by a welcoming committee: of monsters.
Just beat all monsters in the scene before “touching” the big guy (orc) blocking the pathway to the top. Kill ‘em all, go up and on to the next scene.
Waterfall Entrance
Just walk right up for a cutscene, and platforms rise from the lake water. Just “walk” to directions as directed (as if your mates instructed it), and hop along until you come to the front of the entrance gate. Hint: On the top leftmost platform go up into the waterfall – a place where you can save, rest (healing crystal) and shop (orc merchant). Go up to the first stage of Enia’s Sanctum named:

Stage I: Gorgon’s Groves
This area used to be a proving ground for people to be initiated as Enia’s priest. Now, the grove where fairies and nymphs reside is overrun by sinister banshees (who disguise as nymphs), mutants and assorted monsters.
When you arrive in the first scene, walk to the center and touch the epitaph there (with ACTION button) to read it (mandatory for story progress) and the roadblocks will be opened.
Take the way UP to the next screen. Now in each screen there are nymphs roaming around. Well, they are actually banshees disguised as nymphs, and they transform as soon as you touch them or they touch you.
If you download this game up to version 3B, you must face at least two groups of banshees on each screen. However, in Version 5 you can simply avoid the banshees roaming randomly and just go to the next scene (which will be improved if we can even get to make the sixth version).
Gorgon’s Groves itself is actually a mystical maze that can get everybody lost, no redo and no straight detour to the starting point.
So, this is the spoiler of the right route:
START (Rune Room) – UP – LEFT – UP – RIGHT – RIGHT – DOWN – RIGHT – UP – NEXT AREA
Enia’s Sanctum – Temple Entrance
We put no puzzle in this scene. Just walk through the unblocked path, explore and open all terasure chests in the area all the way and enter the temple in main gate in the center of the map.
Enia’s Shrine Room
Now this is another story-related, zero-encounter room used as a rally spot for the Light Side’s “Relief Forces”. If you should wonder what the “Three Gods of Trinity” look like, just touch the statues. Okay, so there are similarities with character graphics in other scenes, no big deal.
Just go to the center of the shrine to trigger a cutscene with Kyflynn Windwalker, Desmond Edmundsen and Vera Vyrkova, at the end of which they’ll join your party.
NOTE: We put a new “Party Management Menu” in Full Version 5 and up, but we still keep the “Party Log Book” system to prevent bugs and just in case we missed something during modifications.
After the cutscene, just walk up and talk to the elf in front of Enia’s statue. Galvanir Deneuve, that elf then goes into an opened secret hole passage on the floor and you just need to follow him to go to the next stage.
Before you go, spare a moment to touch and see Enia’s statue on the top center of the shrine, there’s a chance that a surprise gift might fall into your hands.


Stage II: Typhon’s Tunnels
The rune room is the first scene in the stage, and as usual, go up to it and press ACTION to read the riddle, and again, the roadblocks will vanish.
Before you proceed, MAKE SURE that you put Kyflynn in the main party throughout this stage plus Desmond for best elemental affinity against the guards in this “windy” stage.
Please note that this is the most treacherous stage in Enia’s Sanctum with a very complex route, so for you who wants lesser challenge, just follow the most recommended route in this SPOILER:
(refer to the map diagram above for more thorough information)
All Routes:
Tier 1:
A1 <= C6, A2 <= D4, A3 <= B6, A4 => E1, A5 => B2, A6 => C3
B1 <= F5, B2 <= A5, B3 <= C5, B4 => C2, B5 <= F3, B6 => A3
C1 <= E6, C2 <= B4, C3 <= A6, C4 => D1, C5 => B3, C6 => A1
Tier 2:
D1 <= C4, D2 <= F6, D3 <= G6, D4 => A2, D5 => G2, D6 => E3
E1 <= A4, E2 <= A5, E3 <= D6, E4 => F1, E5 => I2, E6 => C1
F1 <= E4, F2 <= G4, F3 <= B5, F4 => H3, F5 => B1, F6 => D2
Tier 3:
G1 <= H4, G2 <= D5, G3 <= I5, G4 => F2, G5 => I3, G6 => D3
HI <= J4, H2 <= I4, H3 <= F4, H4 => G1, H5 => E2, H6 => I1
I1 <= H6, I2 <= E5, I3 <= G5, I4 => H2, I5 => G3, I6 => BOSS
Recommended Route:
B5 – F3 – Check on the fat lady on the corner of room F, make sure KYFLYNN is in the main party, not standby – Exit through F4 – H3. If you can, come across and exit through H6 – I1 – In Room I, exit through I6 to enter the BOSS room. (Eww... Too easy?)
When you enter the BOSS area, take your time to replenish your health and save your game before going up to the center and trigger a cutscene and a battle with:

BOSS: Wyvern x2 (HP: 4500 x2)
Accompanied by the dark elves, wyverns a.k.a. wind dragons pack a very speedy set of attacks and are hard to hit on a defensive. Skills: Typhoon, Tornado and Whirlwind Slash.
After defeating the boss, just select the exit through the RIGHT tunnel (J2 in the map) to move on to the next stage: Gaea’s Grounds.
vadisworld - my way, my world
FireHeart Blog List
-
Dig Two Graves by Craig Schaefer (reviewed by Mihir Wanchoo) - *Official Author Website* *Pre-order Dig Two Graves over HERE * *Read Fantasy Book Critic's review of The Long Way Down * *Read Fantasy Book Critic's ...1 day ago
-
ROSTA MASTA! The Exotic Super Cars Edition Vol. 01 - The Myth of Speed - ROSTA MASTA! The Myth of Speed Supercars and Hypercars League Edition PALADIN Pagani Huayra (Rival) MINERVA Koenigsegg Agera (Heroine) FENRIR Lykan Hyper...2 months ago
-
-
Wah Chang - The world of Star Trek is a troubled, but ultimately utopian world of interspecies collaboration and peace, a stark counterpoint to the tumultuous 1960’s i...1 year ago
-
-
Grand Emerald 3 – Disewakan lantai 29 (studio) - Rp 2.500.000,-/ bulan Rp 25.000.000,-/ tahun9 years ago
-
Divine Comedy - The Inferno (38 of 38) - --------------- SHARING We encourage sharing--forward to a friend! CANTO XXXIV “THE banners of Hell's Monarch do come forth Towards us; therefore look,” ...9 years ago
-
Galaxy Series at Samsung Forum 2013 - Samsung South East Asia Forum (atau disingkat Samsung Forum) merupakan pameran tahunan Samsung yang menampilkan produk-produk terbaru mereka. Yang menarik ...11 years ago
-
-
[Saint Cloth Myth] Tamashii Nation 2009 Autumn - Exclusive Figures!! - The Autumn Tamashii Nation 2009 will open to the public on Saturday but as always it opens a few days earlier for press visitors and as a result, we get ex...14 years ago
-
Coribug - The 'S hertogenbosch Messenger Beetle, or more commonly known as the Coribug, is one of the cities best kept fantastical secrets. With its sleek star cov...14 years ago
-
Titleless - So I haven't ditched the blog or moved onto other types of books. I've just moved again, and the place I'm at has no internet...yet, and I'm still learning...15 years ago
-
-
-
-
Vadis' Technorati Favourites
Pyr Publishing
Pat's Fantasy Hotlist
Sources and Studies Lookup
FireHeart Most Wanted!
-
Source: http://encyclopedia.thefreedictionary.com/druid Two druids, from an 1845 publication, based on a bas-relief found at Autun , France....
-
Main Branch Synopsis: Chapter One: The Crossroads Maven is a young girl orphaned from birth who wandered around the continent alone; s...
-
s source: https://youtu.be/HAGUDhGtfnw
-
Fantasypedia Category: Medieval Siege Engines Source: http://en.wikipedia.org/wiki/Trebuchet Trebuchet From Wikipedia,...
-
No images? Click HERE . great gift ideas! Great sci-fi & fantasy gift book id...
-
The Crying Princess by Sandie May Angel a.k.a. Sandie Angel Buy this book Sandie Angel'sBooks World ...
-
s Source: http://youtu.be/ceHtrjIVRd8 Vandaria Saga: Winterflame is a crossplatforms fantasy story about a legendary dragon weapon ami...
-
Journey to the Underland with Alice in an all new video game inspired by the Tim Burton film and experience a fantastical world of illusions...
